Extend MapillaryJS
MapillaryJS is a street imagery and semantic mapping visualization platform on the web. It is built from smaller units and some of them can be augmented or overridden by custom implementations. To make this possible, MapillaryJS exposes a set of extension APIs.
By the end of this section, you will be able to use these APIs to extend and augment the MapillaryJS experience with your own data, semantic meshes, 3D models, animations, editing capabilities, camera controls, and interactivity.
You will learn
Custom Rendering#
The custom render guides focus on rendering specific custom objects onto the MapillaryJS street imagery. It is worth noting that anything you can render with WebGL or Three.js in another context, you can also render inside the MapillaryJS. The inverse is also true, if you render some object in MapillaryJS, you can reuse that object in a WebGL or Three.js application somewhere else. To summarize, your 3D objects are reusable.
Overview#
We go into the details of writing custom renderers in the guides, but the overview below explains how the custom render API works, step by step.
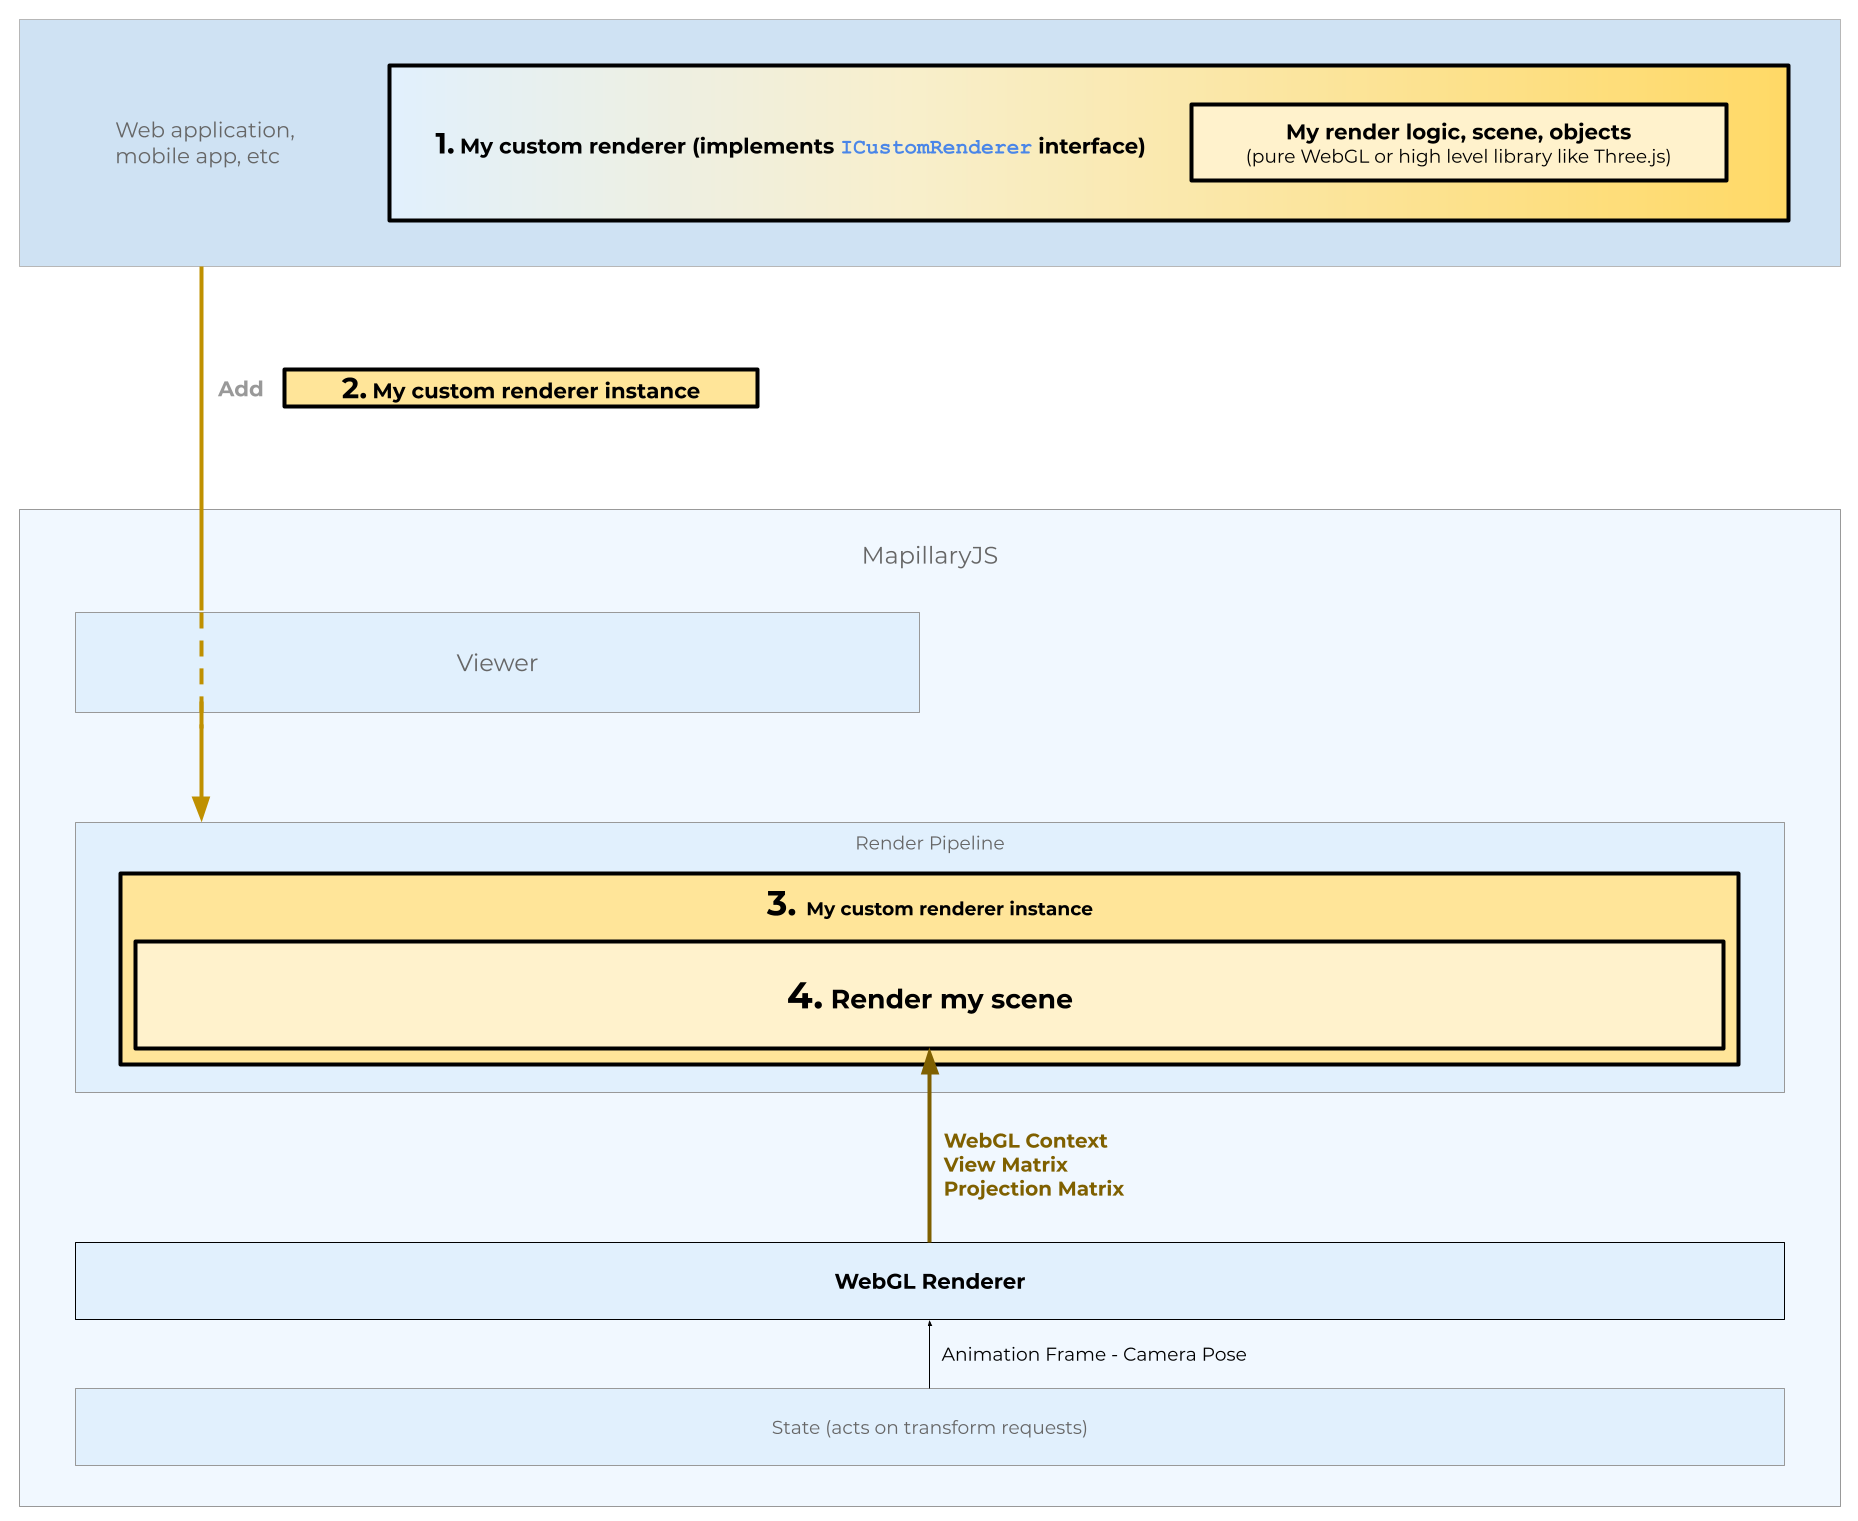
Custom render overview
The custom render API works like this:
- We start at the top, in a web application. We want to render our own 3D models and meshes in MapillaryJS. To do that we create a custom renderer class implementing the ICustomRenderer interface.
- In our application we instantiate a MapillaryJS viewer and add our custom renderer.
- When we add our custom renderer, it becomes part of the MapillaryJS render pipeline.
- Our custom renderer gets notified that it needs to render every time an update occurs. For each update, our ICustomRenderer.render method implementation gets called with the WebGL context, the view matrix, and the projection matrix. We use the matrices to render directly onto the MapillaryJS canvas through the WebGL context.
To dig deeper into the details, take a look at the custom render guides.